

What to Look for During a Fall Roof Inspection
Fall is the best time of year in North Texas to take a hard look at your roof. Spring and summer bring hail, straight line wind, and months of punishing heat, and all three leave marks that are almost impossible to see from the driveway. By late September the weather cools enough to make a full inspection safe and practical for both homeowners and contractors. A proper fall roof inspection covers the shingles, the flashing, the gutters, the attic, and every place water can slip past a seal. Small problems caught in October cost a fraction of what emergency repairs cost in January. Texas winters stay mild most years, but the hard freezes that do arrive can turn a pinhole leak into a soaked ceiling in a matter of hours. This guide walks through exactly what to look for, in roughly the same order a professional inspector would check it. Use it as a checklist before you call anyone out, and use it again after the first big fall storm rolls through Tarrant, Johnson, and Ellis counties.
What to Look for During a Fall Roof Inspection on the Roof Surface
The roof surface tells you most of what you need to know about the condition of the system underneath it. Start from the ground with a pair of binoculars and walk the full perimeter of the house, slope by slope. Do not stop at the elevation facing the street; the back and side slopes often hide the worst wear. South facing and west facing slopes absorb the most direct sun in Texas and nearly always age faster than the rest of the roof. Pay close attention to valleys, since those channels carry the heaviest volume of water on any roof plane. If the pitch is gentle and you own a stable ladder, a closer look from the eave line adds detail you simply cannot get from the yard. Never walk a roof you are not trained to walk, particularly a composition roof that has spent three months baking at surface temperatures well above 150 degrees.
Shingle Damage to Look for During a Fall Roof Inspection
Granule loss is the first thing to evaluate on any fall roof inspection. Asphalt shingles rely on a layer of ceramic coated granules to shield the asphalt and fiberglass mat from ultraviolet light. When those granules wash off, the mat cooks, dries out, and loses flexibility much faster than the manufacturer intended. From the ground, granule loss shows up as shiny or dark patches that look slightly different in color from the surrounding field. You will also see the evidence collecting at the bottom of your downspouts. A light dusting during the first year after installation is normal and expected. Heavy accumulation on a roof that is eight or ten years old is a warning sign that deserves a professional opinion. Once large areas of mat are exposed, repair is rarely a lasting answer and replacement planning should begin.
Hail bruising and wind creasing are the two storm signatures that matter most in this part of Texas. A hail bruise looks like a dark circular spot where the granules were knocked away and the mat underneath was fractured by the impact. It often feels soft to the touch, similar to pressing on a bruise on an apple, and it will not always be obvious in a photograph taken from the yard. Wind damage looks completely different. High gusts lift the tab, break the factory sealant strip, then drop the shingle back down, leaving a horizontal crease across the face. That crease becomes a hinge point, and the shingle will eventually tear along it during the next windy afternoon. Missing tabs, exposed nail heads, and shingles that flutter in a light breeze all point to the same problem. Wind and hail damage from a spring storm frequently goes unnoticed until a fall inspection finds it.
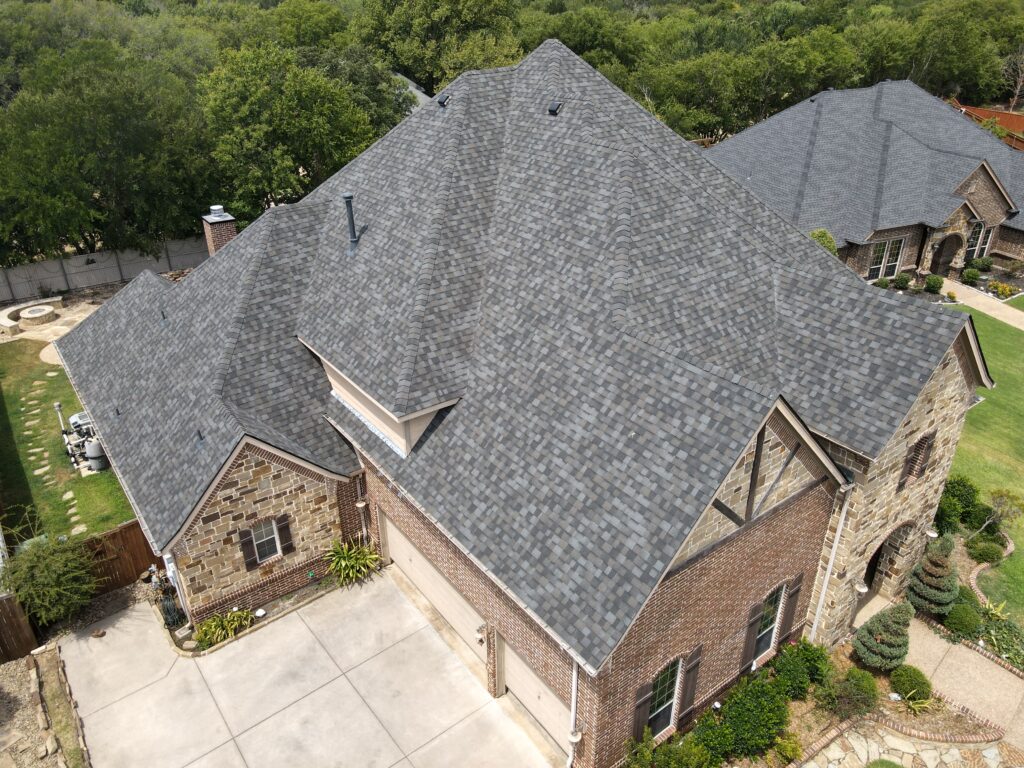
Age related failure has its own set of symptoms, and fall is the right season to sort them out. Look for shingle edges that curl upward, corners that lift away from the deck, and surface cracks that run in irregular patterns across the tab. Check the hip and ridge caps carefully, because caps are bent over a sharp angle and almost always crack before the field shingles do. Scan the ridge line for fasteners that have backed out and now sit proud of the surface. Look for shingles that have slipped down out of alignment, which usually means the nails missed the nailing strip or the deck below has softened. Any shingle that lifts by hand with almost no resistance has lost its seal and will not survive the next north wind. Repairs make sense when the damage is isolated and the rest of the roof still has life left. Need a roofer to take a closer look at what you found? Click here for our roofing services.
Flashing and Penetrations to Check During a Fall Roof Inspection
Flashing failures cause more leaks than worn shingles do, and pipe boots are the single most common culprit in North Texas. A pipe boot is the collar that seals the gap where a plumbing vent passes through the roof deck. Standard boots use a rubber or synthetic gasket that sits against the pipe, and that gasket degrades under constant ultraviolet exposure. In this climate, boots commonly split somewhere between year eight and year twelve, long before the shingles are finished. The crack is easy to spot once you know what you are looking at, since it usually appears as a ring or a vertical tear around the top of the collar. Water then runs straight down the outside of the pipe, into the attic, and out onto the ceiling below. Homeowners often blame the shingles for a leak that a thirty dollar part actually caused. Every fall roof inspection should include a look at each vent stack on the roof.
Chimney and sidewall flashing deserve equal attention. Where a roof plane meets a vertical wall, the installer should have used step flashing, meaning individual metal pieces woven into each course of shingles. A continuous strip of caulk smeared along that joint is not flashing; it is a temporary patch that will fail. On masonry chimneys, look for counterflashing that is set into a cut groove in the mortar and folded down over the step flashing. Rusted metal, gaps at the corners, missing pieces, and dried roof cement all indicate a joint that is about to leak. Chimney crickets, the small ridged structure built behind wide chimneys to divert water, are frequently missing entirely on older homes. Any spot where two different materials meet is a spot where a fall roof inspection needs to slow down and look closely.
Valleys, drip edge, and roof mounted accessories round out the penetration checklist. Open metal valleys should be free of rust, debris, and fasteners driven through the center of the channel. Closed valleys, where shingles weave across the joint, should lie flat with no lifted edges and no exposed nail heads within six inches of the centerline. Drip edge along the eaves and rakes protects the deck edge and directs runoff into the gutter instead of behind it, and Texas code has required it on new work for years. Look for satellite dish mounts, solar attachments, and old antenna brackets fastened straight through the shingles, since each of those fasteners is a potential leak. Turbine vents, box vents, and ridge vents should sit flat with intact flashing on all sides. Sealant around any penetration hardens, shrinks, and cracks over time, and it is not a permanent fix. Note every one of these items now so a repair crew can address them in one trip.
Gutters and Drainage to Review During a Fall Roof Inspection
Gutters do more work in fall than in any other season, and they are the part of the system homeowners neglect the most. Oak, pecan, and elm trees drop leaves across North Texas from late October through December, and that debris packs into the trough and blocks the outlets. Water then backs up, spills over the front lip, and soaks the fascia board behind the gutter. Wet fascia rots, the fasteners lose their grip, and eventually the gutter pulls away from the house entirely. Standing water in a clogged gutter also freezes during a cold snap, and the added weight can bend or detach the entire run. Overflow at the eave saturates the ground right against your foundation, which is a serious concern in the expansive clay soils common throughout Tarrant and Johnson counties. Clean the troughs, flush every downspout, and confirm water exits freely at the bottom.
Sizing and slope matter as much as cleanliness. Most homes use five inch K style gutter, but steep or large roof planes often shed more water than five inch can carry during a heavy Texas downpour. Six inch gutter paired with larger downspouts handles that volume far better. Each run needs a consistent fall toward the outlet, roughly a quarter inch of drop for every ten feet of length. Sagging sections that hold water after the rain stops indicate loose hangers or an incorrect pitch. Downspouts should discharge at least four feet away from the foundation, farther on lots that slope back toward the house. Splash blocks and buried extensions both work, as long as water actually moves away. Ready to solve overflow before the leaves fall? Click here for our gutter services.
While you have the ladder out, look at what is sitting in the bottom of the trough. A thick layer of granules mixed with the leaves confirms the shingle surface is wearing down and gives you a rough sense of how quickly. Check for a gutter apron, which is the metal flashing that carries water from the deck edge into the trough rather than behind it. Missing apron is a frequent cause of rotted fascia and soffit on older homes. Inspect the seams and end caps for pinholes and separated joints, since sealant fails long before the aluminum does. Look at the hangers themselves and note any that have pulled loose from the fascia. Finish by confirming the gutter sits below the shingle line so runoff lands inside it during a hard rain and not out over the edge.
What to Look for During a Fall Roof Inspection Inside the Attic
The attic is the half of the inspection most homeowners skip, and it often reveals problems the roof surface hides. Pick a bright day, bring a strong flashlight, and give your eyes a minute to adjust once you are inside. Step only on the framing or on a secured walkway, never on the drywall between joists. Work from one end of the attic to the other and study the underside of the decking above every roof plane. Water leaves a record inside an attic long before it stains a ceiling, so most active leaks can be identified up there first. You are also checking airflow, insulation depth, and the structural condition of the deck itself. Twenty minutes in the attic in October can save you a five figure repair bill later.
Attic Leak Signs to Find During a Fall Roof Inspection
Start by looking for daylight. Any pinpoint of light coming through the deck means an open hole, and where light passes, water follows. Then scan the underside of the sheathing for dark staining, which usually appears as an irregular brown or black patch spreading out from a nail or a seam. Fresh stains look damp and have crisp edges; older stains dry to a chalky ring with a distinct outline. Follow the stain uphill, because water tracks along rafters and travels sideways before it drips. That means the entry point is frequently several feet away from the wet spot on your ceiling. Check the framing around every penetration you noted from the outside, including vent stacks, bath fans, chimneys, and skylights. Rusted nail shanks poking through the deck are another reliable sign that moisture has been present.
Mold and mildew growth tell a longer story. Black or gray patches on the underside of the sheathing point to chronic moisture, not a single storm event. Sometimes the source is a roof leak; other times it comes from a bath fan venting straight into the attic instead of through a roof or gable termination. Feel the insulation in the suspect area, because insulation that is compressed, matted, or discolored has been wet at some point. A musty odor when you first open the attic hatch is worth investigating even when nothing looks obviously wrong. Water heaters, HVAC drain pans, and condensate lines installed in attics create their own leaks that mimic roof problems exactly. A trained inspector separates plumbing and mechanical issues from actual roof failures. Correct diagnosis saves you from paying for the wrong repair.
Skylights and chimney chases need individual attention. Skylights leak at the flashing kit far more often than through the glass, and the curb corners are the usual failure point. Look at the framing directly beneath each skylight for staining and soft wood. Chimney chases on framed chimneys often have gaps where the chase meets the roof deck, and those gaps let both water and conditioned air escape. Check the area around any attic mounted equipment for rust streaks on the metal, which indicate repeated dripping. Photograph everything you find and note the location relative to a fixed landmark such as the attic access or the ridge. Those photos become valuable documentation later if a storm claim gets filed.

Attic Ventilation Checks During a Fall Roof Inspection
Ventilation controls the temperature and moisture level of your attic, and poor ventilation shortens the life of a roof considerably. A balanced system pulls cool outside air in low at the soffits and pushes hot humid air out high at the ridge. Building code generally calls for one square foot of net free vent area for every 150 square feet of attic floor, and that ratio can be reduced to one in 300 when intake and exhaust are properly balanced. During a fall inspection, look up at the eaves from inside the attic and confirm you can see light or feel airflow at the soffit vents. Insulation blown over the top of the soffit openings is one of the most common problems in this region, and baffles solve it inexpensively. Blocked intake starves the entire system no matter how much exhaust sits on the ridge. Without intake, ridge vents and turbines simply pull conditioned air out of your living space.
Mixing exhaust types creates a different problem entirely. When a roof has both a ridge vent and powered or turbine vents, the powered unit draws air in through the ridge vent instead of from the soffits. That short circuit leaves large sections of the attic completely unventilated, and it can pull rain and wind driven debris in through the ridge. Choose one exhaust method per attic space and make sure it is sized for the square footage below it. Confirm that bath fans and kitchen vents terminate outside the building, not into the attic cavity. Damp air dumped into an attic in December condenses on the cold underside of the deck and drips back down onto the insulation. Check that flex duct runs are still connected, since they commonly separate at the collar over time. Good airflow protects both the shingles above and the insulation below.
Soffit and fascia condition ties directly into ventilation performance. Wood soffits rot when gutters overflow, and once the panel deteriorates, animals move into the attic and tear the insulation apart. Look for chewed openings, nesting material, and daylight around the eave edges. Vented aluminum or vinyl soffit resists rot and maintains consistent intake area across the entire eave. Damaged fascia allows the drip edge and gutter to pull away, which restarts the whole cycle of water intrusion. Repairing the eave system correctly is part of protecting the roof, not a separate cosmetic project. Have damaged soffit, fascia, or exterior panels that need attention? Click here for our siding services.
Insulation and Decking to Inspect During a Fall Roof Inspection
Insulation depth affects your winter energy bills and your roof at the same time. The Department of Energy recommends roughly R38 to R60 in attics across most of Texas, which translates to somewhere between twelve and twenty inches of blown fiberglass or cellulose depending on the product. Grab a tape measure and check the depth in several places rather than trusting one spot near the hatch. Insulation that is thin, uneven, or compressed lets heat escape into the attic in winter and lets attic heat pour into the house all summer. Look for gaps around the attic hatch, at can lights, and along the top plates of exterior walls. Any area that has been wet needs to be replaced rather than dried, since wet insulation loses most of its rated value permanently. Correcting insulation levels is one of the least expensive upgrades available to a homeowner.
Roof decking is the structural layer everything else depends on, and fall is the right time to assess it. Sight down the length of each rafter bay and look for sagging between the framing members. Deflection usually means the sheathing has absorbed moisture, delaminated, and lost its stiffness. Older homes in this area sometimes have plank decking with wide gaps between boards, which limits nail holding capacity for modern shingles. Press gently on suspect areas and note any that feel spongy or flex under light pressure. Delaminated oriented strand board looks swollen and fuzzy along the edges and will not hold a fastener reliably. Damaged decking must be replaced during a reroof, and identifying it early gives you a far more accurate budget.
Framing and fastener condition finish the attic portion of the inspection. Check for cracked rafters, split trusses, and any modification where someone cut a truss member to run duct or plumbing. Look at the nails coming through the deck, since heavy rust indicates ongoing condensation or a leak nearby. Confirm that the roof to wall connections show no separation or movement, especially on homes that have experienced foundation shifting in clay soil. Note any sistered or repaired framing so you know the history of the structure. Write everything down while you are still in the attic, because details fade quickly once you climb back out. A written record makes the conversation with your contractor faster and far more productive.
Why You Need a Professional Fall Roof Inspection Before Winter
A homeowner walkthrough catches the obvious problems, and that is genuinely valuable. A professional inspection catches the ones that stay invisible until water is already inside your house. Roofers evaluate hail bruising by touch, test shingle seal strength by hand, and measure ventilation against the actual square footage of your attic. They also document conditions in a format insurance carriers accept. Getting that inspection done in fall gives you time to schedule repairs before the first freeze instead of scrambling during a January storm. The inspection itself should cost you nothing.
What a Professional Fall Roof Inspection Includes
A complete professional fall roof inspection starts on the roof, not from the driveway. The inspector walks every accessible slope, checks the seal on the shingles, and examines each penetration and flashing joint up close. Hail damage gets marked and counted by test square, which is the standard method carriers use to determine the extent of a storm event. The attic gets inspected for leaks, ventilation, decking condition, and insulation depth. Photographs of every finding come back to you in a written report you can keep.
The report should tell you three things clearly: what is wrong, what it will take to fix, and roughly how much roof life remains. Repair recommendations and replacement recommendations are different conversations, and an honest contractor will tell you plainly which one applies. A roof with isolated boot failures and a few wind damaged tabs needs a repair, not a sales pitch. A roof with widespread mat exposure and failed seals is a replacement candidate no matter how it looks from the street. Clear information lets you plan on your own timeline instead of reacting to an emergency.
Timing the inspection for fall gives you the widest set of options. Repair crews have more availability in October and November than they do the week after a spring hail event. Material lead times are shorter, and scheduling is far more flexible. You also gain the chance to address gutters, soffit, and ventilation in the same visit rather than paying for multiple mobilizations. Every item you resolve before December is one less thing leaking during the first hard freeze.
How a Fall Roof Inspection Protects Your Insurance Claim
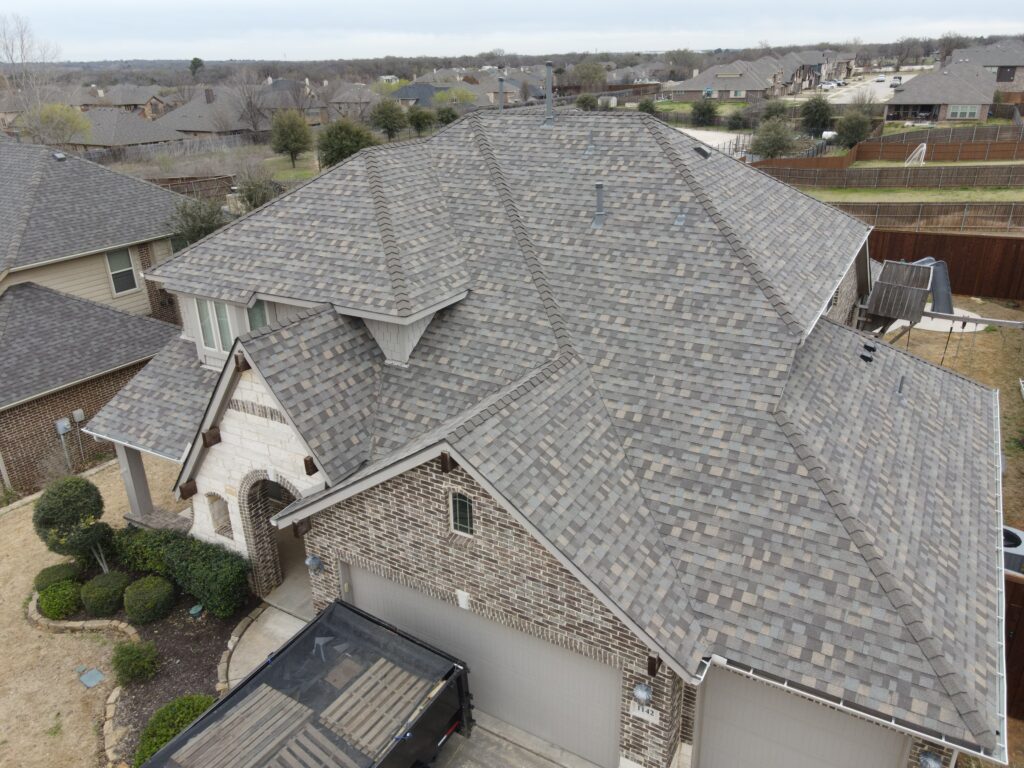
Documentation is the difference between an approved claim and a denied one. Texas homeowners deal with hail and wind on a regular basis, and carriers scrutinize storm claims carefully. A dated inspection report with photographs establishes the condition of your roof at a specific point in time. When damage occurs later, that record makes it much harder for anyone to attribute the loss to age or neglect.
Reporting deadlines matter more than most homeowners realize. Policies require prompt notice of a loss, and Texas law places limits on how long you have to bring a claim. Damage from a spring storm that goes unreported until the following year creates real problems for the claim. A fall inspection frequently uncovers hail hits from months earlier that are still well within a reportable window. Finding that damage now protects your right to file.
Understanding your policy before a storm hits saves frustration afterward. Many Texas policies apply a percentage deductible to wind and hail losses rather than a flat dollar amount. Some carriers have moved older roofs to actual cash value coverage, which pays depreciated value rather than replacement cost. Knowing which applies to your home changes how you plan financially for a repair or a replacement. A reputable contractor will explain the process honestly and will never suggest anything improper regarding your deductible.
Why Choose KG Roofing & Renovations for Your Fall Roof Inspection
KG Roofing & Renovations holds an A+ rating with the Better Business Bureau, and we work hard to keep it. We are a preferred contractor for both IKO and Owens Corning, which means our crews are trained and vetted on the systems we install. Every replacement job we complete carries a four year labor warranty on top of the manufacturer coverage on the materials. Our estimates are free and carry no obligation of any kind. You get a straight answer about the condition of your roof, even when that answer is that you do not need one yet.
We also handle repairs differently than most contractors in the area. Any roof repair you pay us for gets credited in full toward a future replacement with our company. That policy exists because we would rather extend the life of a serviceable roof than push you into a replacement you do not need. It removes the pressure from the decision and puts you in control of the timing. Homeowners across Mansfield, Arlington, Burleson, Midlothian, Waxahachie, and the surrounding communities have trusted us for exactly that reason.
Fall moves quickly, and the first cold front is never far behind the last warm week. Getting your roof inspected now means repairs happen on a comfortable October afternoon instead of during a freezing rain event in January. We will walk the roof, inspect the attic, document what we find, and give you a written report with photos. Call KG Roofing & Renovations at (817) 368-5115 or email info@kgroofs.com to schedule your free fall roof inspection. We are located at 1906 Lone Star Rd Suite B in Mansfield, TX, and we would be glad to take a look before winter arrives.