

How New Siding Can Make Your Home Warmer This Winter
North Texas homeowners tend to think about winter comfort in December, but the smartest time to fix a cold house is right now, while the weather still allows for clean exterior work and installer schedules are open. Siding does far more than set the look of your home; it is the outermost layer of a wall system that controls air movement, sheds water, and protects the insulation hiding inside your framing. When that layer gets old, brittle, or loose, cold north wind finds every gap, and your heating system runs longer to make up the difference. Replacing worn siding gives a contractor the rare chance to open up the wall, seal the leaks, correct old flashing mistakes, and add continuous insulation across the entire exterior. That combination is what actually changes how a house feels in January, not just how it looks from the street. This guide explains the building science behind warmer walls, the warning signs that your current siding is costing you money every cold snap, and what a professional replacement should include from start to finish.
How New Siding Makes Your Home Warmer in Winter
Warmth in a house comes down to three things: keeping heated air inside, slowing heat transfer through solid materials, and keeping the insulation dry enough to do its job. Old siding fails at all three at once, usually in ways a homeowner cannot see from the yard. New siding, installed correctly over a properly detailed weather resistive barrier, closes off the air pathways that let conditioned air escape through the walls. Insulated siding products add a layer of rigid foam that covers the studs, plates, and headers where standard batt insulation never reaches. Correct flashing and drainage keep rain and melting ice out of the wall cavity, so the insulation behind your drywall stays dry and keeps its rated performance. Each improvement is modest on its own, but stacked together across every exterior wall, they change how evenly your home holds heat through a long cold night.
How New Siding Blocks Winter Air Leaks and Drafts
Air leakage is the fastest way a home loses heat, and it happens through hundreds of small openings rather than one obvious hole. Every place something passes through your exterior wall creates a potential leak: hose bibs, dryer vents, electrical outlets and light fixtures, cable and internet penetrations, gas line entries, and the seams where different materials meet. On older homes, those openings were often sealed with a bead of caulk that has since shrunk, cracked, and pulled away from the substrate, leaving a gap you could slide a business card into. When wind hits the north or west wall of your house during a cold front, it pressurizes that side of the building and drives outside air straight through those openings into your wall cavities and living space. The same pressure difference pulls heated air out of the opposite side of the house, which is why one room can feel drafty while another feels stuffy. Your furnace or heat pump does not fail in those conditions; it simply cannot keep up with a house that is constantly exchanging warm air for cold.
A siding replacement is the only practical time to address those leaks from the outside, because the entire wall surface becomes accessible at once. After the old material comes off, an experienced crew inspects the sheathing, seals penetrations with the appropriate sealant or spray foam, and installs a continuous weather resistive barrier with taped seams and properly lapped edges. That barrier does two jobs at the same time: it drains any water that gets past the cladding, and it functions as an air control layer that stops wind from washing through the wall assembly. Housewrap that was stapled loosely in 1998 and never taped does very little of that work, which is common on homes built during that era. Detailing around windows and doors matters just as much as the field of the wall, since the rough opening perimeter is a notorious leak point. Sill pans, head flashing, and sealed jambs turn those openings from weak spots into sealed transitions.
The comfort difference from air sealing shows up faster than most homeowners expect, because drafts are felt directly on the skin long before a thermostat registers a temperature change. A room that used to feel ten degrees colder near the exterior wall starts to feel consistent with the rest of the house. Energy Star reports that a combination of air sealing and improved insulation can trim roughly eleven percent off a typical home’s total energy costs, and cold months are where much of that shows up in North Texas. There is a durability benefit too, since air moving through a wall carries humidity with it, and humidity that condenses on cold sheathing eventually causes rot and mold. Stopping the airflow stops that moisture transport. Want to see how a full exterior upgrade is handled from tear off to trim? Click here for our siding replacement service.
How Insulated Siding Adds R Value to a Cold Winter Wall
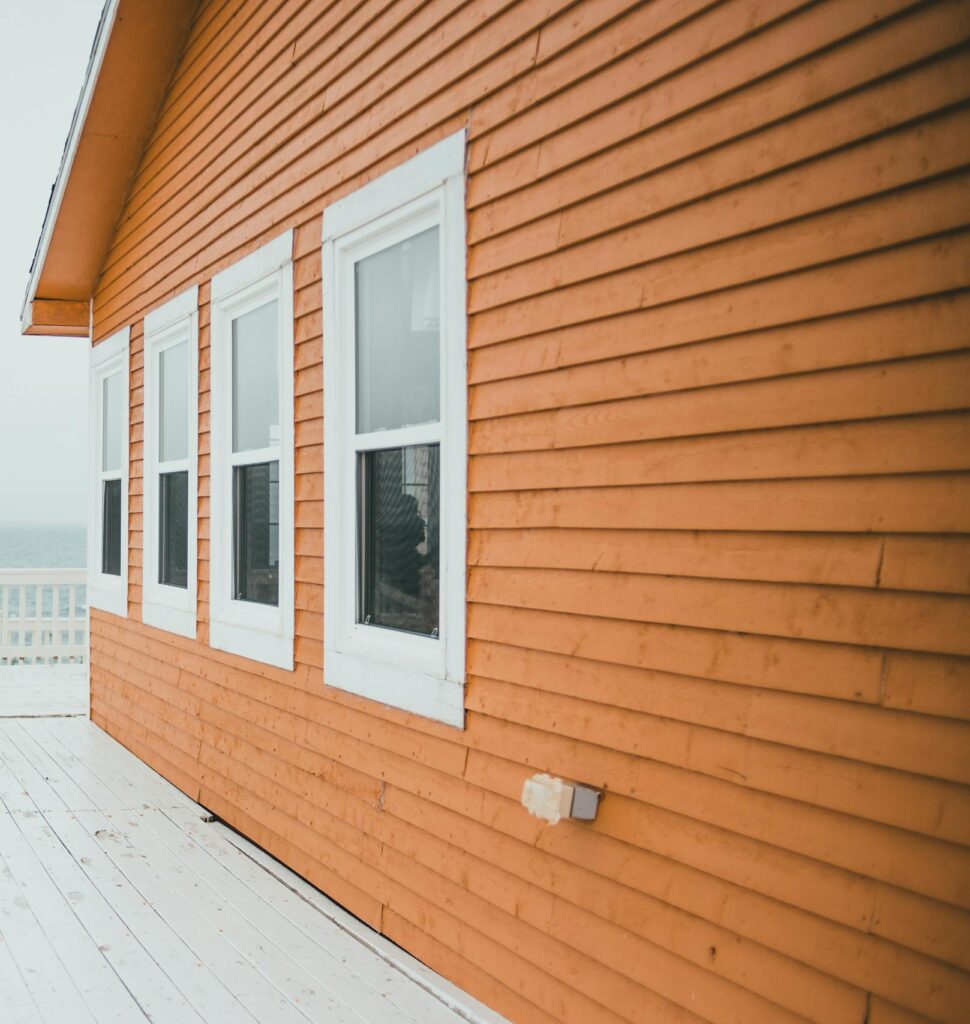
R value measures resistance to heat flow, and the honest truth is that most cladding materials contribute very little of it on their own. Standard hollow back vinyl siding carries an R value of roughly 0.61, fiber cement lands near 0.5, and traditional wood lap siding falls somewhere around 0.8 depending on thickness. Those numbers explain why simply swapping one style of siding for another does not change a heating bill in any meaningful way. Insulated siding is a different product entirely, built with a contoured expanded polystyrene foam backing that is laminated or fitted tightly against the panel. Depending on foam thickness, those systems typically deliver somewhere between R 2 and R 3.5, with premium profiles reaching higher. That figure sounds small next to an attic, until you consider that it applies across the entire wall surface without interruption.
The value of continuous exterior insulation is that it covers the parts of your wall that batt insulation cannot. Fiberglass batts only fill the cavities between studs; they stop at every stud, top plate, bottom plate, header, and corner assembly. A layer of foam applied outside the sheathing runs uninterrupted across all of it, which raises the effective performance of the whole assembly rather than just the cavity. That is why building codes have steadily pushed toward continuous exterior insulation in newer construction. For an existing home in North Texas, adding it during a siding replacement is far more practical and far less invasive than opening up interior walls. You get the upgrade as part of work you were already going to pay for.
Insulated panels bring a few secondary benefits that homeowners notice right away. The rigid backing supports the panel across its full length, so the siding lies flatter, resists impact better, and does not rattle or oil can in high wind the way hollow panels sometimes do. Sound transmission from traffic, mowers, and neighborhood noise drops noticeably because the foam absorbs vibration. In our climate zone, the same insulation that slows heat loss in January slows heat gain in August, so the benefit runs in both directions across the year. One caution worth stating plainly: exterior insulation is a supplement to attic insulation, not a replacement for it. The Department of Energy recommends attic insulation in the R 30 to R 60 range for our region, and a home that falls short there should address the attic alongside any wall work.
How New Siding Stops Thermal Bridging That Makes Your Home Feel Colder
Thermal bridging is the movement of heat through a solid path that conducts better than the material around it, and in a wood framed house, the framing itself is that path. A two by four stud provides roughly R 4.4 of resistance, while the fiberglass batt beside it might provide R 13. Framing typically accounts for twenty to twenty five percent of a wall’s total area once you include studs at sixteen inches on center, plates, headers over openings, and multi stud corners. That means a meaningful fraction of your wall is performing at a third of its rated insulation value. Heat naturally follows the easiest route out of a building, so it concentrates at those framing members. On a cold morning, thermal imaging of a typical wall shows the stud pattern glowing through the drywall.
You can sometimes see the effect without any equipment at all. Homeowners occasionally notice faint vertical stripes of dust or discoloration on interior walls, spaced evenly apart, which is called ghosting; it happens because those cooler surfaces attract condensation and airborne particles. Corners of rooms feel colder than the middle of the same wall for the same reason, since corner framing creates a dense block of conductive wood. Rooms above garages and bump out additions often feel worst because they have more framing and more exposed surface area relative to their size. None of that is fixable by turning up the thermostat, which only makes the heating system cycle harder while the cold surfaces stay cold. Radiant heat loss to a cold wall surface is a real part of why a room feels uncomfortable even when the air temperature reads seventy.
Continuous foam backed siding interrupts that bridge by placing an unbroken layer of insulation outside every framing member. Heat traveling out through a stud now has to pass through the foam before reaching the exterior, which slows the whole process and raises the interior surface temperature of the wall. Warmer interior surfaces mean less condensation, fewer cold spots, and a room that feels comfortable at a lower thermostat setting. The improvement is most obvious on walls facing north and west, which take the brunt of winter wind in Tarrant, Johnson, and Ellis counties. Homes built in the 1970s and 1980s benefit the most, since many were framed and insulated to standards well below what we build to today. Pairing the wall upgrade with replacement windows on those same elevations produces the largest comfort gain of any exterior project. If drafty windows are part of your problem, click here for more information on our window replacement service.
Signs Your Old Siding Is Making Your Home Colder Every Winter
Siding rarely fails all at once; it degrades slowly enough that homeowners adjust to the symptoms without connecting them to a cause. The material may look acceptable from the curb while performing poorly where it counts, behind the panels and at the seams. Winter is when those failures become expensive, because every gap becomes a path for cold air and every wet spot becomes compromised insulation. Knowing what to look for lets you make a decision based on condition rather than waiting for a leak to force the issue. A walk around your house with a critical eye takes fifteen minutes and tells you most of what you need to know. The rest of the picture comes from your utility bills and how individual rooms feel during a cold front.
Warping, Cracking, and Loose Siding That Let Winter Air Inside
Vinyl siding expands and contracts significantly with temperature, moving as much as half an inch across a twelve foot panel between a July afternoon and a January night. Correct installation accounts for that movement by leaving the nails slightly loose, roughly the thickness of a dime under the nail head, and by leaving clearance where panels meet trim and accessories. When siding is nailed tight, or butted hard against J channel, it has nowhere to go and buckles into visible waves along the wall. Those waves pull panel edges away from the locking course beneath them, breaking the shingle style overlap that sheds water and blocks wind. Once that lock is broken, air passes freely behind the cladding and pressure washes the housewrap with every gust. You will often hear it before you see it, as a rattle or a low clatter along one wall during a windy night.
Cracking tells a different story, usually one about age and impact. Vinyl becomes more brittle as it ages and as ultraviolet exposure breaks down the surface, which is why an old panel shatters from a hailstone that a new panel would shrug off. Fiber cement and wood products crack differently, splitting along the grain or at fastener locations where water got in and froze. Look closely at the bottom courses, around hose bibs, and under window sills, since those areas take the most abuse from splashback, sprinklers, and string trimmers. Any crack or hole is a direct opening into the wall cavity for air, water, insects, and rodents looking for a warm place to spend the winter. Small holes also let wind driven rain past the drainage plane, wetting insulation that then takes weeks to dry.
Failed caulk joints are the most common and most overlooked problem of all. Exterior sealant has a service life, and the standard grades used a decade or two ago typically start cracking and losing adhesion within seven to ten years in Texas heat. Run your finger along the joints where siding meets brick, where trim meets siding, and around every penetration; sealant that is hard, chalky, or separated from one side has stopped working. Homeowners sometimes try to solve everything with a fresh bead of caulk, which helps at isolated spots but cannot compensate for a cladding system that has aged out. Caulk is meant to be a secondary defense, not the primary one; the panels, laps, and flashings are supposed to do the real work. When the primary system fails, replacement is the honest answer rather than another season of patching.
Moisture Damage Behind Old Siding That Ruins Winter Insulation
Wet insulation does not insulate. Fiberglass depends on trapped air pockets to slow heat transfer, and when those pockets fill with water, the material’s effective R value drops sharply until it dries out completely. A wall cavity that gets damp during a December rain may stay damp for weeks in cold weather, since low temperatures slow evaporation to a crawl. That means one leak can degrade a section of wall for most of the heating season without ever producing a visible stain indoors. Homeowners assume the wall is fine because the drywall looks clean, but the performance loss is already happening. Moisture problems behind siding are, in that sense, an energy problem long before they become a structural one.
The signs are subtle from outside but consistent once you know them. Soft or spongy spots when you press on siding, staining or streaking below window corners, peeling paint on trim, and a musty smell near the base of a wall all point to water intrusion. Rusted fastener heads and dark streaks running down from nail lines suggest water has been moving inside the assembly for a while. Interior clues include flooring that has cupped near an exterior wall, baseboards separating slightly, or paint that bubbles in one specific area. Ants and termites are drawn to consistently damp wood, so unexplained insect activity along one wall deserves a closer look. Any of these findings justifies pulling a section of siding to inspect the sheathing underneath.
Most moisture problems trace back to details rather than to the siding material itself. Missing kickout flashing where a roof edge meets a wall is a leading cause; without it, a season of runoff dumps directly behind the siding at that corner and rots the sheathing from the inside out. Improper window flashing, reverse lapped housewrap, and siding installed tight to the roof surface instead of holding a clearance gap cause similar damage. Those are installation errors, and they persist until someone removes the cladding and corrects them. A siding replacement is the moment to fix all of it: replace damaged sheathing, install correct flashings, establish a functioning drainage plane, and set the new material with proper clearances. Doing that work once, correctly, protects the framing for decades. Planning a broader exterior update at the same time? Click here for our home remodeling services.
High Winter Heating Bills and Cold Rooms Caused by Failing Siding
Your utility bill is a useful diagnostic tool if you compare it the right way. Look at your winter usage in kilowatt hours or therms across the last three years rather than at the dollar amount, since rates change independently of your home’s performance. Usage that climbs year over year, while your household size, thermostat habits, and heating equipment stay the same, points to an envelope that is getting leakier. Degree day data from the same period helps you account for a mild winter versus a harsh one. A single cold snap can distort a month, but a three year trend rarely lies. Homeowners who track this often find the increase began around the time other siding symptoms appeared.
Room by room comfort tells you where the problem lives. Walk your house on a cold, windy morning and note which rooms lag behind the thermostat setting and which walls feel cold to the touch. Rooms with two or three exterior walls, rooms over garages, and rooms on the north and west sides typically show the worst performance. Hold the back of your hand near outlets, switch plates, and baseboards on exterior walls; noticeable air movement there means the wall cavity is connected to the outdoors. A stick of incense or a lit match held near those points makes the airflow visible if you want confirmation. Recording what you find gives your contractor a specific list to address rather than a general complaint.
The last piece is heating system behavior. Equipment that runs nearly continuously on a moderately cold day, or that short cycles repeatedly without satisfying the thermostat, is fighting a load the house should not be creating. Homeowners frequently respond by upsizing the furnace or adding space heaters, which raises operating cost without fixing the underlying loss. Sealing and insulating the envelope reduces the load itself, so the existing system runs less and lasts longer. It also makes any future equipment replacement cheaper, since a tighter house needs smaller capacity. Fixing the shell first is the sequence that saves the most money over time.
Why You Need New Siding Installed Before Winter Arrives
Timing matters more with siding than with most exterior projects, because installation quality depends partly on temperature. Late summer and early fall in North Texas offer the most reliable stretch of workable weather in the entire year, with stable temperatures and fewer rain delays than spring. Scheduling now means your walls are sealed and insulated before the first real cold front, instead of during it. It also means you avoid the rush that follows every hailstorm, when contractor schedules fill and material lead times stretch. A project started in the next several weeks is typically finished, cleaned up, and delivering results by the time you need it. Waiting until January narrows your options and puts you at the back of the line.
The Best Time to Schedule New Siding Installation Before Winter
Vinyl becomes more brittle as temperatures drop, and manufacturers publish specific cold weather instructions for a reason. Below roughly forty degrees, installers must increase the expansion gaps at panel ends and take extra care when cutting, since cold vinyl chips and cracks rather than shearing cleanly. Adhesives, sealants, and housewrap tapes also have minimum application temperatures, and applying them below those thresholds compromises the bond. None of this makes winter installation impossible, but it does make it slower and more demanding. Scheduling in warmer weather removes those variables entirely.
There is a practical comfort factor as well. Siding replacement means your wall sheathing is exposed for part of each working day, and homeowners are much happier with that when the outdoor temperature is pleasant. Crews work more efficiently in moderate weather, which shortens the total duration of the project. Shorter projects mean less disruption to your driveway, your landscaping, and your daily routine. Getting on a schedule early also gives you time to choose colors and profiles without rushing the decision.
Material availability is the last consideration. Popular colors and insulated profiles sometimes carry longer lead times, especially after a storm season pushes regional demand higher. Ordering early protects your timeline and gives you the full range of options rather than what happens to be in stock. It also lets your contractor plan the sequence properly if your project includes windows, gutters, or roofing alongside the siding. Coordinating that work correctly prevents rework and produces better flashing details at every transition. A single crew handling the whole exterior means no one is pointing fingers about who owns a leak.
What to Expect From a Professional New Siding Installation
A proper installation begins with a full inspection, not a measurement. Your contractor should evaluate the existing siding, look at flashing conditions at roof to wall junctions, check for moisture damage, and discuss what is likely to be found once the old material comes off. You should receive a written scope that specifies the product, the underlayment, the fasteners, the trim details, and how damaged sheathing will be handled if it turns up. Clear terms on that last point prevent surprises in the middle of the job. A contractor who avoids the question is telling you something.
The work itself follows a sequence. Old siding and trim come off, sheathing is inspected and repaired as needed, penetrations are sealed, and a weather resistive barrier is installed with taped seams and correct lapping. Flashings go in at windows, doors, and roof intersections, including kickout flashing where a roof edge terminates against a wall. Starter strip, corner posts, and accessories are set to establish straight lines before the field panels go up. Panels are then installed with the fastening and clearance specifications the manufacturer requires, which is what preserves both the warranty and the performance.
Cleanup and final inspection close out the job. Every fastener, cutoff, and scrap should be removed from your yard, with magnetic sweeps run across driveways and walkways. Your contractor should walk the entire perimeter with you, point out the details that were corrected, and confirm the finished work matches the scope you signed. You should also receive your manufacturer warranty documentation along with the workmanship warranty in writing. Keep both with your home records, since they matter at resale.
Why Choose KG Roofing and Renovations for Your New Siding Installation
KG Roofing and Renovations has built its reputation on exterior work done correctly the first time, and we hold an A+ rating with the Better Business Bureau to back that up. We are a preferred contractor for IKO and Owens Corning, which reflects both our installation standards and our commitment to using materials that perform in Texas conditions. Every replacement job we complete carries a four year labor warranty, because we stand behind the work our crews do and not just the products we install. Estimates are free with no obligation, and we will tell you honestly when a repair makes more sense than a replacement. Our roof repairs are also paid forward, meaning we apply full credit from a repair toward a future replacement.
Working from our Mansfield office, we serve homeowners across Tarrant, Johnson, and Ellis counties, including <a href=”https://kgroofs.com/locations/arlington/”>Arlington</a>, Burleson, Cedar Hill, Midlothian, Waxahachie, Southlake, and the surrounding communities. That local footprint means we understand how North Texas wind, hail, and humidity actually affect a wall assembly over time. It also means we are close by if you ever need us after the job is finished. We handle siding, windows, gutters, and roofing under one roof, so every transition and flashing detail is coordinated by a single team. That approach eliminates the gaps that show up when separate contractors work around each other.
The best time to make your home warmer is before you need it to be. If your siding is warped, cracked, chalking, or simply original to a house built decades ago, a professional evaluation will tell you what it is costing you and what a replacement would actually deliver. We will inspect your walls, document what we find, and give you a straightforward written estimate with no pressure attached. There is no charge for the visit and no obligation to move forward. Call KG Roofing and Renovations today at (817) 368-5115 or email info@kgroofs.com to schedule your free siding evaluation before the first cold front arrives.